Mechanical Installation Manual (450, 525, 600)
11. Mount Wedge Pack
Mount Wedge Pack Introduction
Care must be taken to ensure clean working conditions. Wearing clean gloves is highly recommended to keep caustic substances off skin and prevent oil and grease from getting on adhesive surfaces.
For concealed cable entry, take note of the Actuator cable routing side. Knowing the routing side will be required when configuring the system.
11.1. Prepare Parts and Hull
- Wipe the area to be bonded with acetone or denatured alcohol and plain white paper towels.
- Replace the tape around the border of the abraded portion of the transom where the Transom Plate will be mounted. Mask around the mounting location as well as the bottom of the boat. The tape will help keep the surrounding gelcoat clean of adhesive. The inside of the Cable Gland should be covered to avoid adhesive from entering the gland, particularly when installing with a Concealed Cable Entry as indicated in Section 10.1.
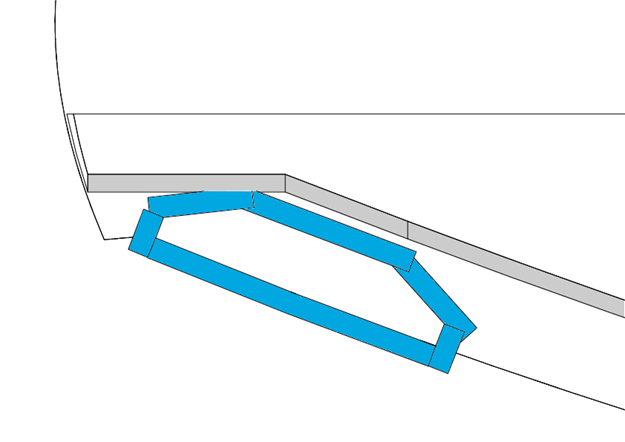
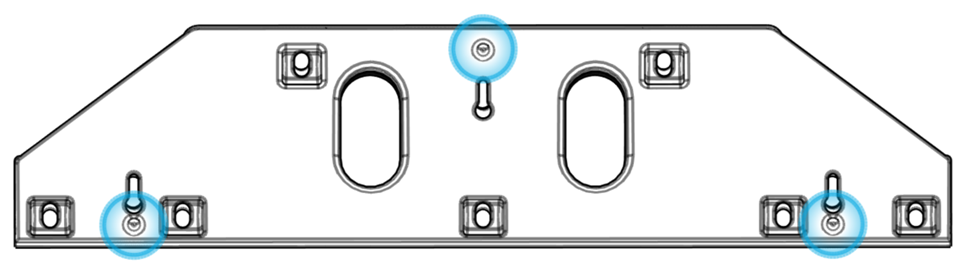
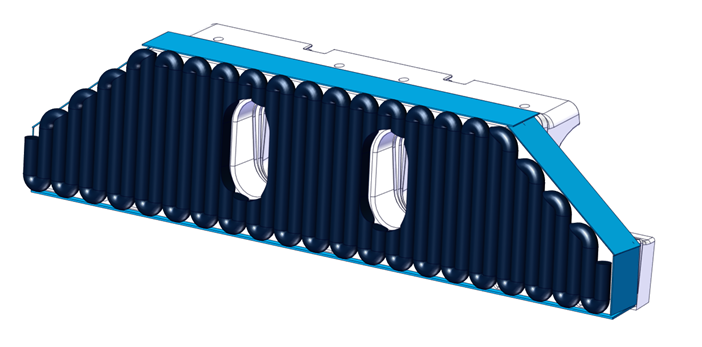
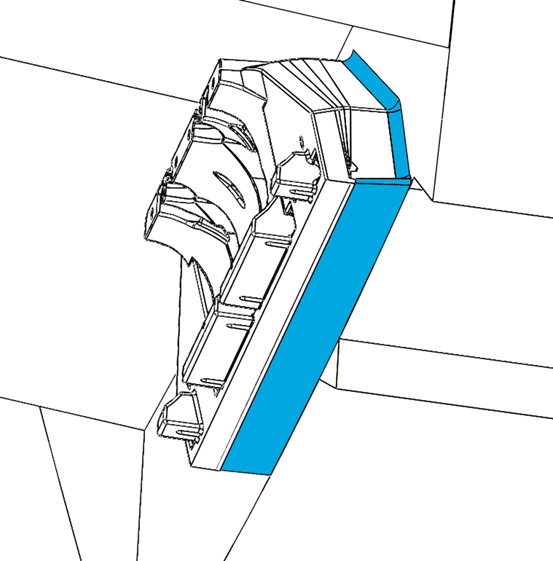
- Tape the top and side edges of the Wedge Pack Assembly. Note: The drain holes on the Wedge Pack Assembly, circled in the figure below must be covered with tape to avoid adhesive clogging them.
- Wipe the Wedge Pack down with acetone or denatured alcohol using plain white paper towels to remove oil/surface contaminants.
11.2. Sand Adhered Surface
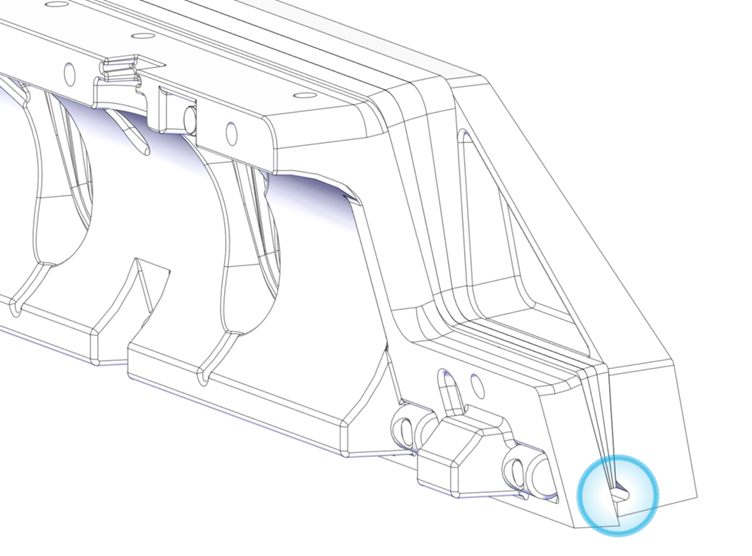
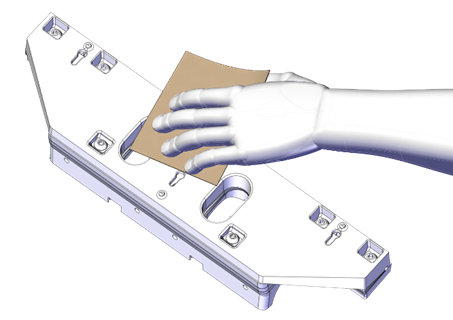
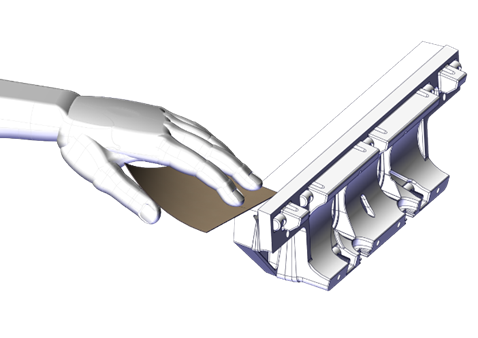
- Using 60 grit sandpaper, scuff the entire back and bottom of the Transom Plate by hand. You may use a Dual Action Sander (DA), but you must be extremely careful not to remove excess material. DO NOT use a grinder or heavy abrasive for this process. The mounting surface of the Transom Plate should have a matte gray finish when properly prepared with sandpaper. Note: Be careful not to sand down the standoff bumps on the plate circled in blue below.
11.3. Clean Adhered Surfaces
- Wipe the Wedge Pack down with acetone or denatured alcohol and plain white paper towels a second time to remove oil and/or surface contaminants after sanding.
- Clean the transom mounting location with acetone or denatured alcohol and plain white paper towels a second time to remove oil and/or surface contaminants after sanding.
11.4. Mount Wedge Pack

Note: For concealed cable entry, the Cable Gland Tube must be inserted before mounting the Wedge Pack.
- Apply approved two-part adhesive to both the Transom Plate and transom. Use at least the amount of adhesive listed in the table below to ensure both surfaces are covered completely by adhesive. There must be enough adhesive between the Transom Plate and the transom for a strong bond with no voids. The Transom Plate has three (3) stand offs to allow for adequate adhesive thickness once mounted. Note: Work from this point on should be deliberate, keeping in mind the working time of the adhesive being applied. Warmer temperatures reduce working time.
Please verify the approved two-part adhesive selected from the list is compatible with your hull material. If in doubt, contact the approved two-part adhesive manufacturer for best practice instructions with your given hull material. Some materials may require a primer for best adhesion. See here 3. Tools Needed – Seakeeper Manuals

Approved two-part adhesives come in multiple mixing ratios – 1:1, 2:1, or 10:1. Use the correct dispense gun and mixing nozzles for the adhesive type. Failure to do so will result in poor adhesion and will void the systems warranty.
Table 3 – Adhesive Quantity
Quantity:
| Controller Size | Minimum Adhesive Quantity (per boat) | Minimum Adhesive Quantity (per Controller) |
| 450 mm | 900 ml | 450 ml |
| 525 mm | 1050 ml | 525 ml |
| 600 mm | 1200 ml | 600 ml |
- Install the Wedge Pack Assembly by sliding the keyholes over the positioning screws. Excess adhesive should appear around the entire perimeter of the Wedge Pack Assembly as the Wedge Pack is pressed into place.
11.5. Confirm Location
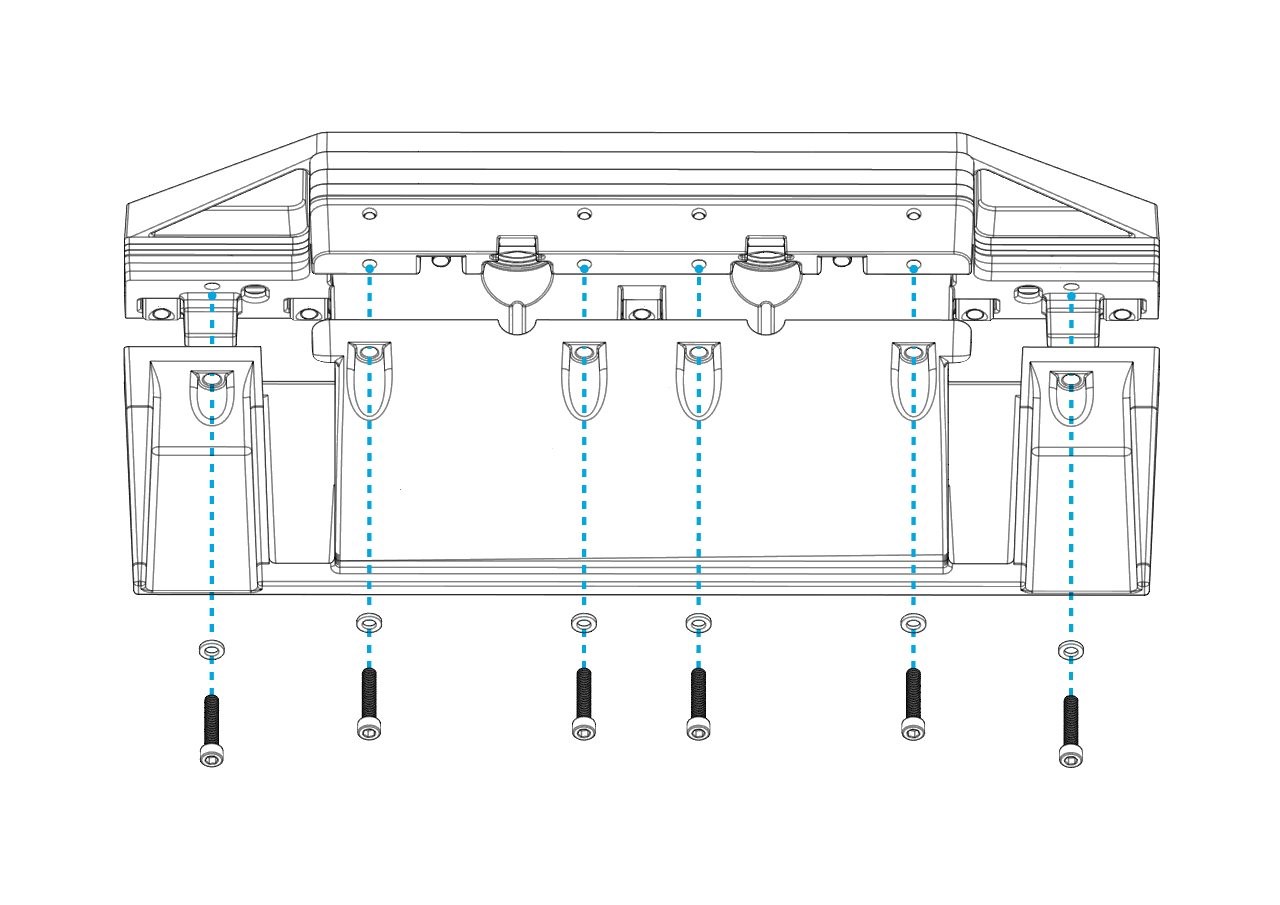
- Add the Seal Plate to the assembly to check its position as indicated in Section 9. Insert the six (6) M6-1.0 x 30 mm bolts and washers to hold the Seal Plate, as shown below. (600 mm Controllers will have eight [8] bolts and washers.) Note: Apply threadlocker, but do not apply the final torque during this step.
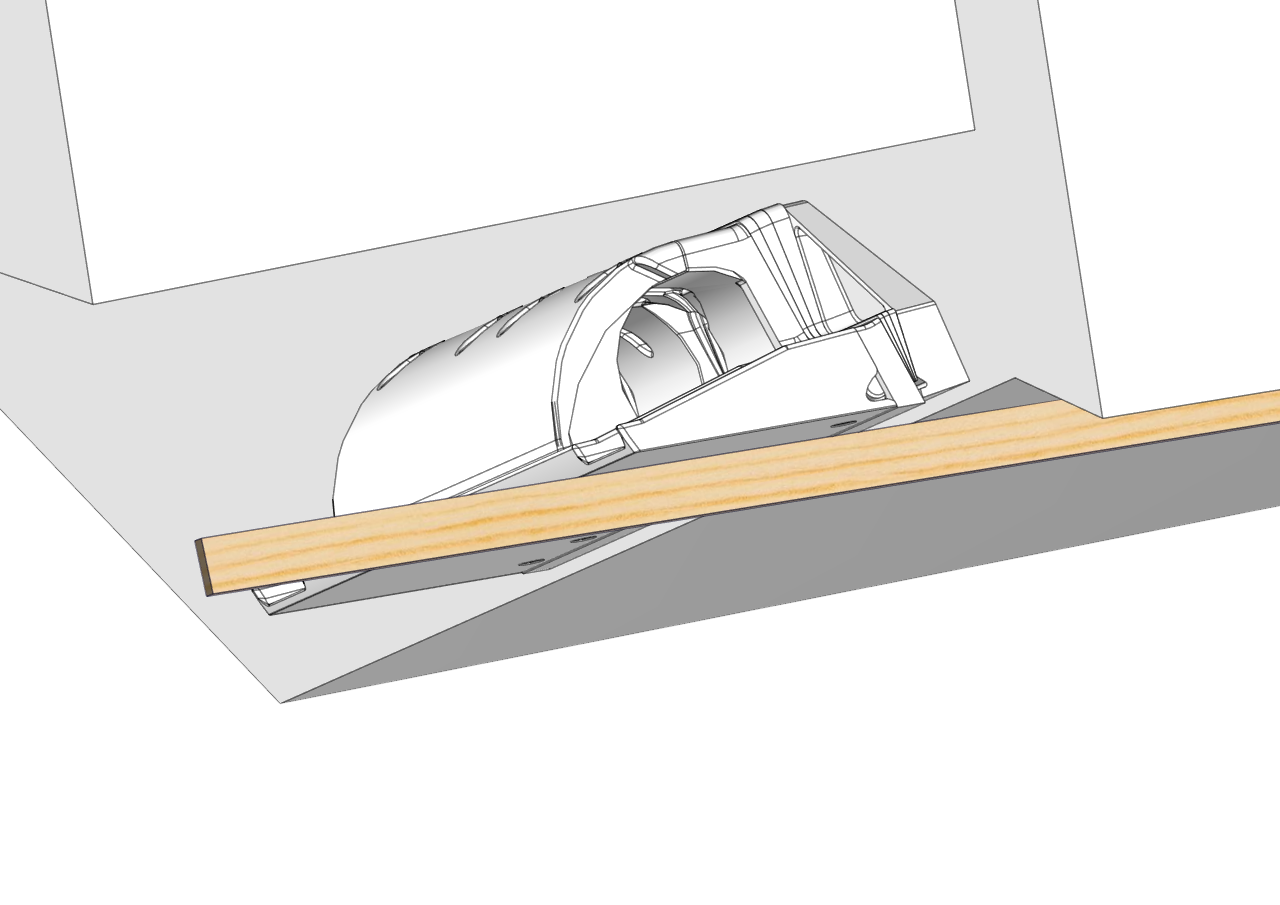
- Using a straight edge, verify the Wedge Pack is flush with the hull bottom in the desired location as determined in Section 5. Be sure location requirements previously called out are met. Due to different hull shapes and features, the Seal Plate may not be flush with the hull bottom across its full span.
- Once the position is confirmed, remove the Seal Plate, and tighten the positioning screws with a Phillips head screwdriver. The screws must be tight enough to press out excess adhesive and keep the assembly from sagging, but do not overtighten or the transom plate may crack.
Note: In the uncommon case that the measured transom angles for the inboard and outboard sides of a Controller location (found in Section 6.1) are greater than 2 degrees apart, tighten beginning on the side with the larger transom angle pulling it tight to the transom. On the side with the smaller transom angle, gently advance the screws but do not tighten it all the way to the transom. If the screws on the side of the smaller transom angle are overtightened, the Wedge Pack will warp and cause issues.
11.6. Fair in Excess Glue
- Using a squeegee, putty knife, or tongue depressor, fill in the gap between the running surface of the hull and the Actuator Plate with excess adhesive, as shown below. Apply extra adhesive as needed. Note: The smooth transition from the hull bottom to the Seal Plate is critical for achieving the best performance out of the system.
- Using a squeegee, putty knife, or tongue depressor, clean away excess adhesive.
ATTENTION: For concealed cable entry, clean out all of the adhesive from around the Cable Gland. You must make sure the Cable Gland will be accessible after the adhesive cures.
- Make a smooth transition with adhesive on the upper edges of the Transom Plate to the transom. Apply extra adhesive as needed.
- Remove the masking tape from the Wedge Pack Assembly and transom. If needed, clean any excess adhesive using acetone or denatured alcohol and plain white paper towels.
- After fairing, check that the drain hole has remained clear. See Figure 57.
- Allow adhesive to cure before proceeding. Some adhesives have ‘handling times’ where the product feels firm but is not ready for loading. Some adhesives also have required times before submersion. Please follow the adhesive manufacturer’s instructions.
- For aluminum hulls, upon completion of the installation use a paint or similar coatings to protect the edges of aluminum from corrosion seeping between the approved two-part adhesive and aluminum.