Seakeeper 35 / 30HD Installation Manual (90268-7)
Fiberglass Hull Preparation
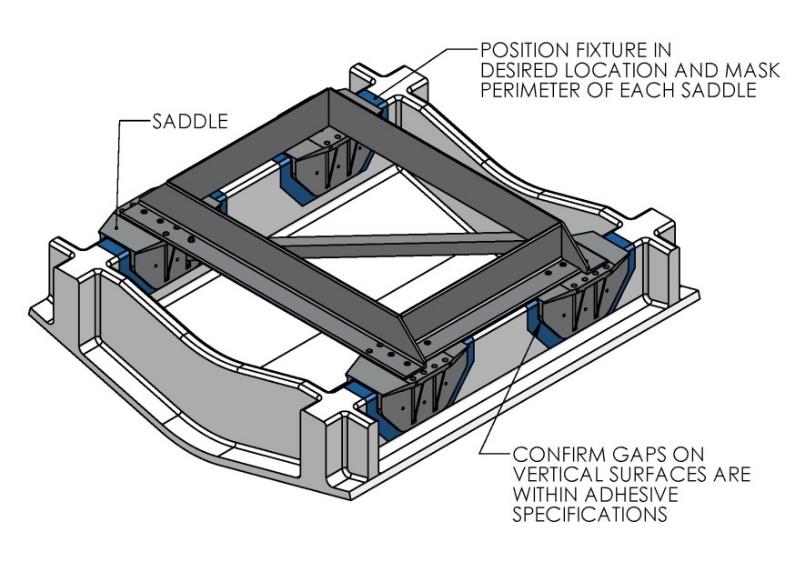
- Position installation fixture (Figure 10) on hull girders noting recommended clearances for maintenance from Figure 2 (in Section: Selection of Installation Location). Check that the screws fastening the saddles to the installation fixture are tight (Figure 8).
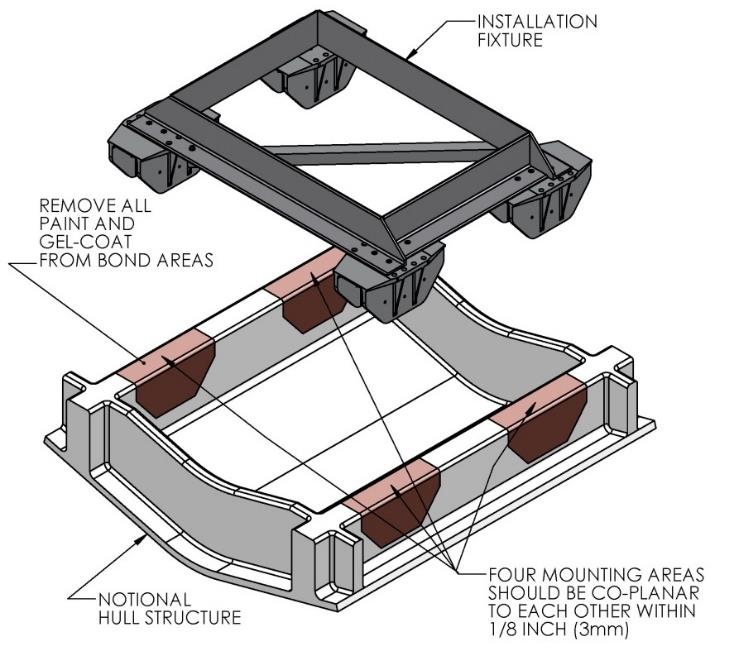
- Mask hull area (as shown in blue, Figure 11) around foundation saddles for easy clean-up and to create an outline of surface area to receive adhesive, as shown in brown (Figure 10). Ensure that the bond gap is within adhesive manufacturer’s recommended thickness, or 3 mm if using Plexus MA590.
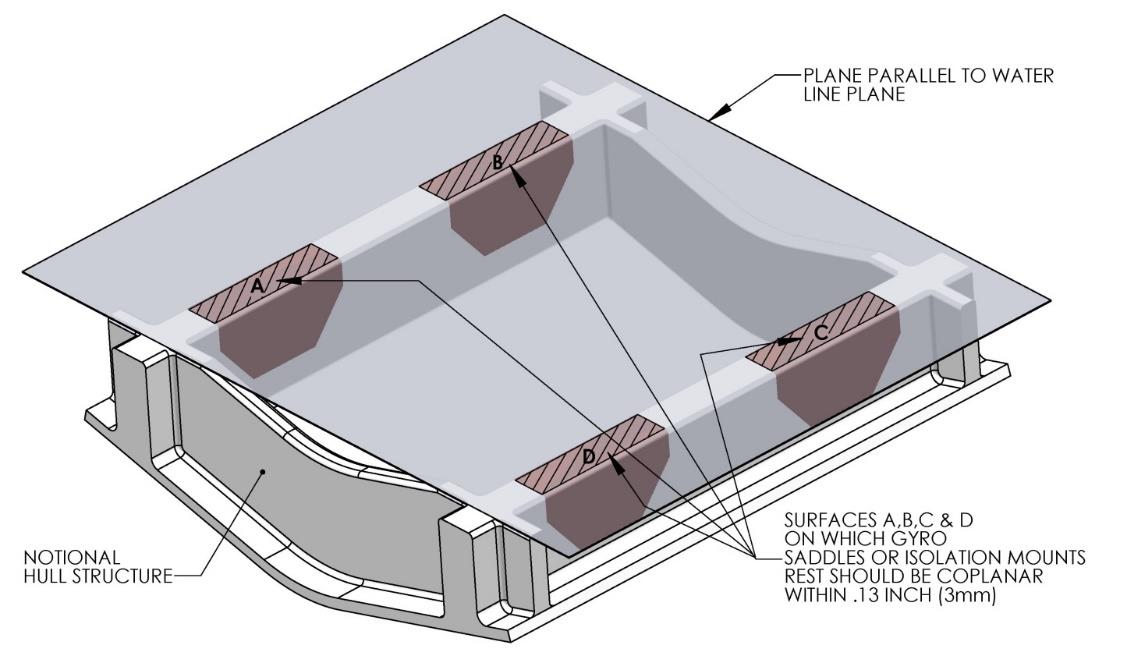
- Raise fixture clear of foundation. Check all four mounting areas are co-planar to within .13 in. (3 mm) to each other, as well as parallel to the water line plane, as shown in Figure 12.
- Thoroughly clean with alcohol or acetone all areas (highlighted in brown, Figure 10) of girders to be bonded to remove any contaminates. Use new paper towels for cleaning, not shop rags.
- Remove any paint or gel-coat from bond surfaces so that adhesive will bond directly to laminate fibers and resin.
- Thoroughly sand girder bond surfaces with 80 grit sandpaper. (IMPORTANT – BOND STRENGTH MAY BE REDUCED IF THIS STEP IS SKIPPED.)
- Wipe surfaces clean from dust with alcohol or acetone using new paper towels, not shop rags.
- Re-position installation fixture on girders and double-check that the adhesive gap is within the adhesive manufacturer’s maximum recommended thickness. Seakeeper recommends a maximum gap of 3 mm if using Plexus MA590.
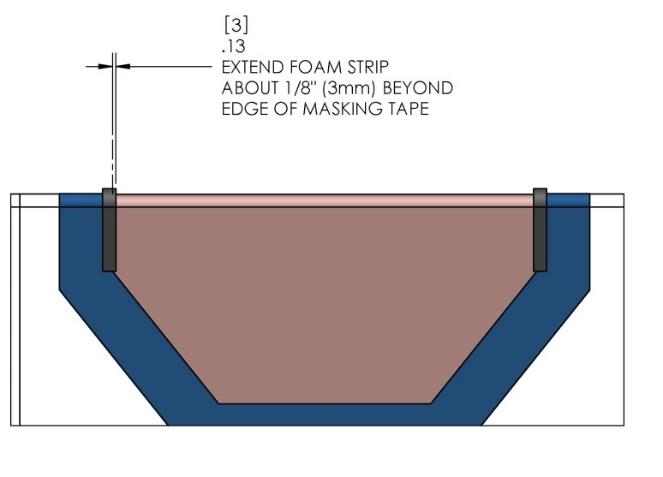
- Lift installation fixture clear of foundation. Apply Seakeeper provided adhesive backed foam strips at the eight locations shown (each end of four saddles) in Figure 13 below. These strips are to serve as a dam to minimize adhesive escaping out the ends of the saddles as they are positioned over the bond area.
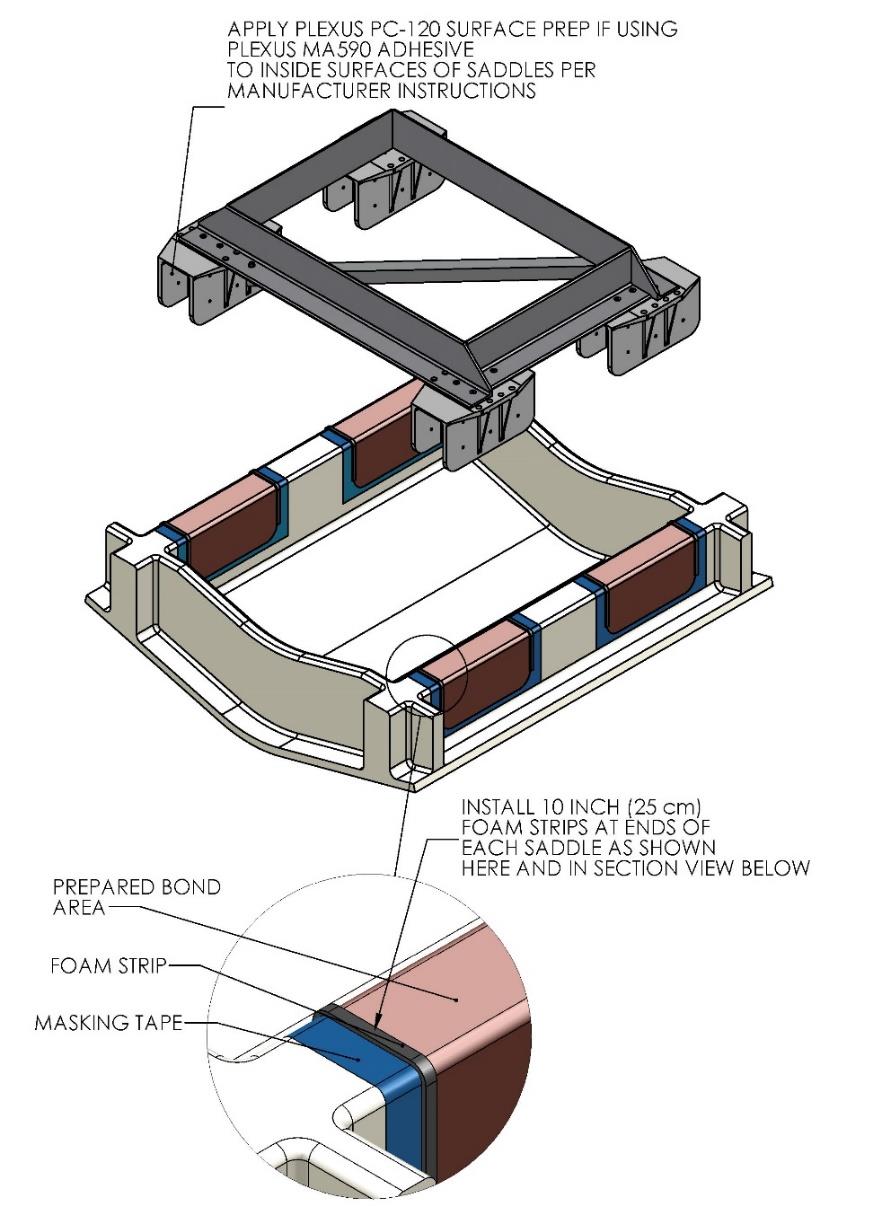
Note: If bonding saddles to a metal structure, contact Seakeeper for hull preparation instructions.