Seakeeper 9 Installation Manual (90222-10); S/N 9-212-3388 to 9-234-4899
2.5.3 Hull Preparation
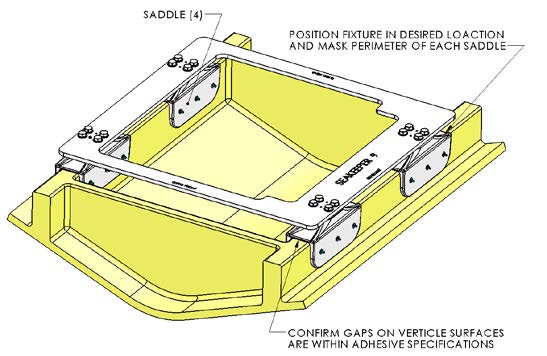
- Position installation fixture (Figure 8) on hull girders noting recommended clearances for maintenance from Figure 2 (in Section: Selection of Installation Location). Check that the screws fastening the saddles to the installation fixture are tight (Figure 6).
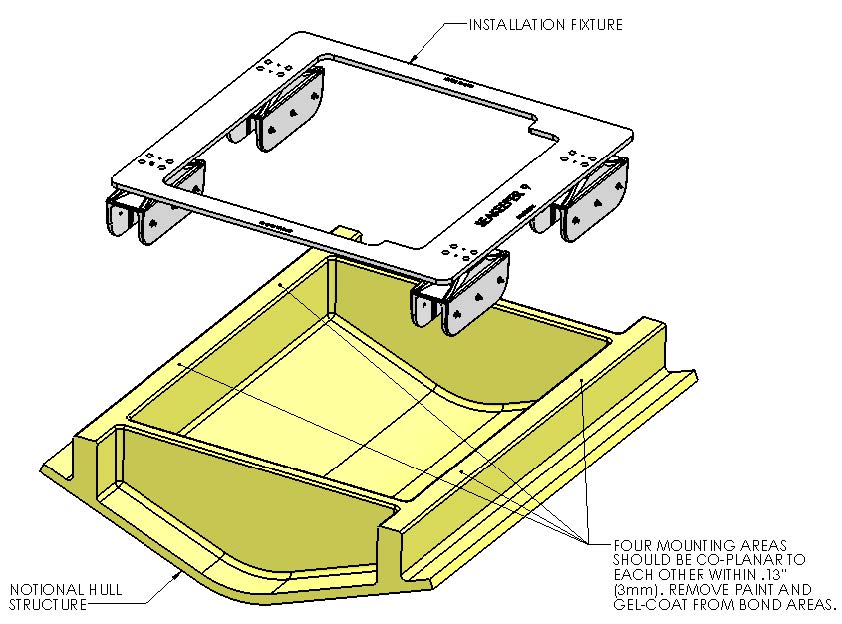
- Mask hull area (Figure 9) around foundation saddles for easy clean-up and to create outline of surface area to receive adhesive as (Figure 8). Ensure that the bond gap is within Seakeeper’s recommended thickness, or 3 mm if using Plexus MA590.
- Raise fixture clear of foundation. Check all four mounting areas are co-planar to within .13 in. (3 mm) to each other, as well as parallel to the water line plane, as shown in Figure 8.

- Thoroughly clean with alcohol or acetone all areas of girders to be bonded to remove any contaminates. Use new paper towels for cleaning, not shop rags.
- Remove any paint or gel-coat from bond surfaces so that adhesive will bond directly to laminate fibers and resin as shown in Figure 8.
- Thoroughly sand girder bond surfaces with 80 grit sandpaper. (IMPORTANT – BOND STRENGTH MAY BE REDUCED IF THIS STEP IS SKIPPED.)
- Wipe surfaces clean from dust with alcohol or acetone using new paper towels, not shop rags.
- Re-position installation fixture on girders and double-check that the adhesive gap is within the adhesive manufacturer’s maximum recommended thickness. Seakeeper recommends a maximum gap of 3 mm if using Plexus MA590.
Note: if bonding saddles to a metal structure, follow adhesive manufacturer instructions for metal substrates.