Mechanical Installation Manual (750-1500)
7.2 Secure Actuator Plate
- Locate the following pieces:
- Qty five (5) M8 Cylindrical Washers (Qty six [6] for 525 Controllers and nine [9] for 750 Controllers.)
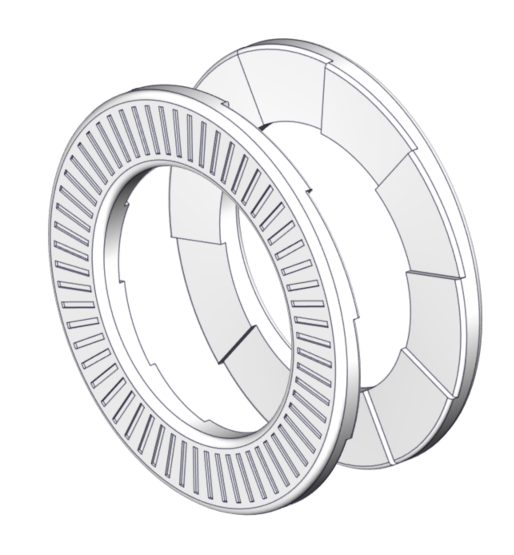
- Qty five (5), M8 Wedge Lock Washers (Qty six [6] for 525 Controllers and nine [9] for 750 Controllers.)
- Each washer has 2 components.

- Qty five (5), M8 Nuts (Qty six [6] for 525 Controllers and nine [9] for 750 Controllers.)
- Each washer has 2 components.
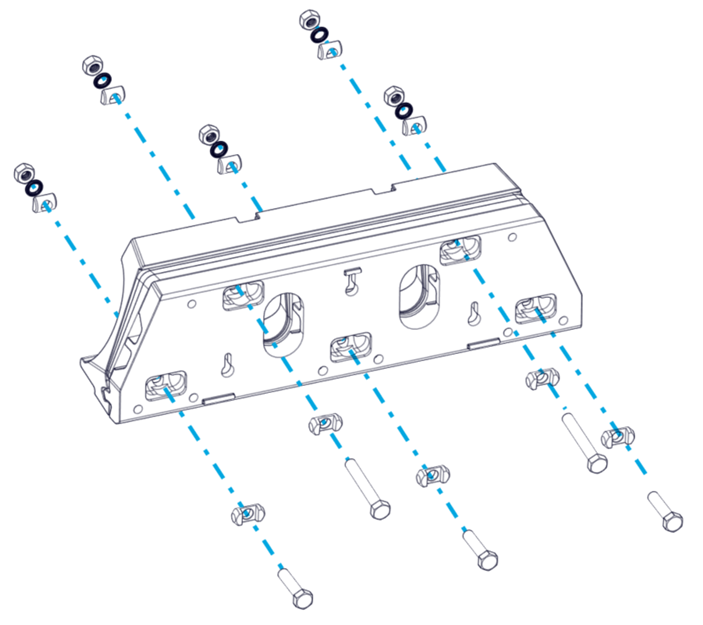
- Insert all the cylindrical washers, flat face out, onto each of the bolts within the milled pockets on the Actuator plate.
- Insert all the wedge lock washers onto each of the cylindrical washers.
- Thread all the nuts onto each of the bolts of the assembly hand tight.
- Check the bolt length is sufficient to engage all threads of the nuts.
- Tighten nuts to 130 in-lbs (14.7 N-m)
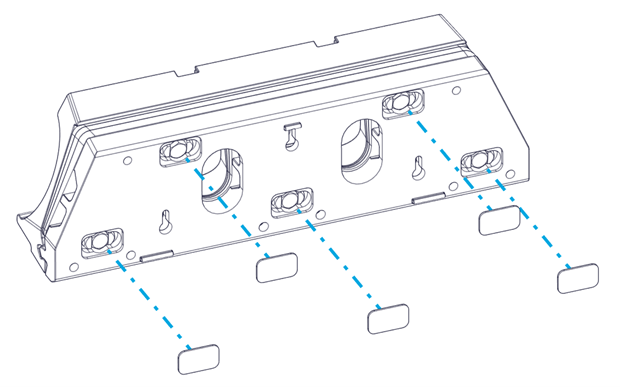
- Adhere Bolt Covers.

Note: Be sure to use the correct bolt length. Incorrect bolt length may result in insufficient thread engagement or the inability to attach the Seal Plate in later steps.

Note: All variables to be torqued to in-lbs NOT ft-lbs.

Repeat this process for all Controllers to create the Wedge Pack Assemblies before moving on.
