Seakeeper Ride Actuator Replacement
Ride Actuator Replacement
Checking Actuator Friction Maintenance
The Seakeeper Ride design utilizes a round Actuator clamped in place by the Seal Plate and Actuator Plate. This design allows for flexibility in installations, easy maintenance, reduced stocking parts as well as preventing damage if underwater objects are struck. Before replacing the Seakeeper Ride Actuator, ensure maintenance has been performed by following these procedures.
- Ensure you have access to Controllers. If the boat is in the water this may not be possible, and therefore the boat may need to be hauled or trailered for the full procedure.
- With the boat hauled out or on a trailer, turn on the Seakeeper Ride system on.
- Select Manual Mode on the Seakeeper Ride application.

- Ensure no fault codes are present on the Seakeeper Ride system, which ensures the Actuators will hold the Blade in place.
- Go to each Controller individually and attempt to move the Blade up and down by hand. Do not use excessive force, approximately 5lbs (2.2 kg) is sufficient.
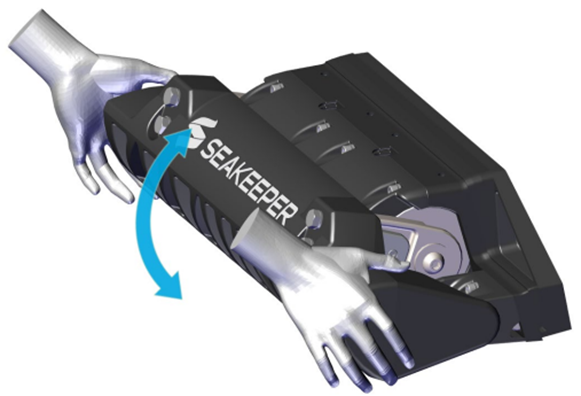
- The Blade should be ‘locked’ in place by the Seakeeper Ride control system. If there is no movement, the equipment passes this check.
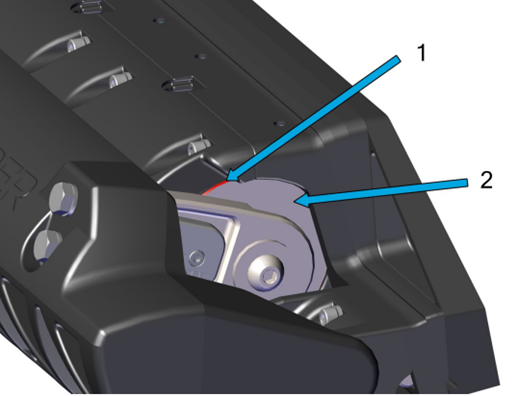
- If the Blade and the silver portion on the side of the Actuator (surface 2 below) move together while the black outer rim of the Actuator (surface 1 below, highlighted in red) stays in place, review procedure and ensure the Seakeeper Ride system is turned on and commissioned and in Manual Mode.
Actuator Replacement
Removing the Faulty Actuator
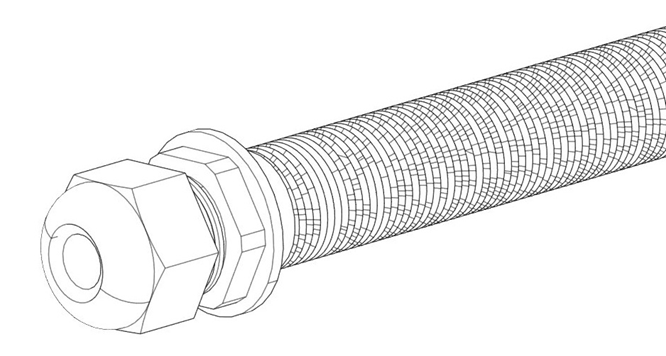
- Loosen the Cable Gland nut from the inside of the vessel to pull the Actuator cord out.
- Unpin the current Actuator being replaced from the AMP Seal plug case.
- Cut off current shrink wrap and unclip the plastic casing protecting the Actuator wires.
- Use a pick tool to gently move the plastic pieces holding the pins and pull the pins out.

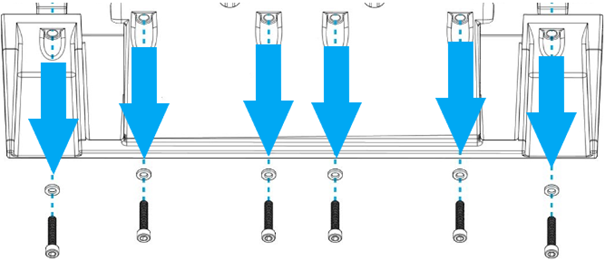
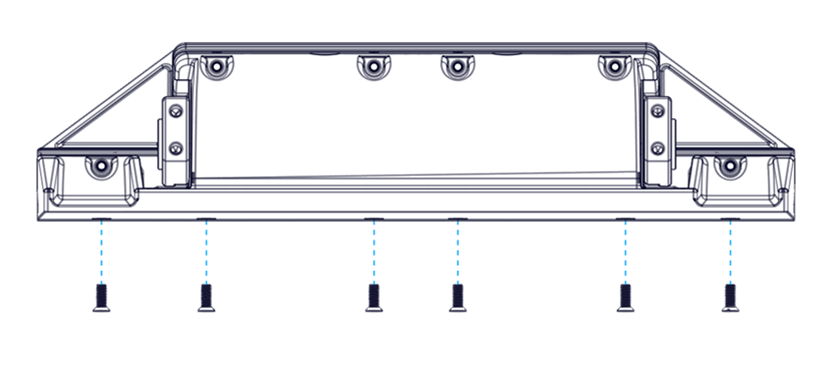
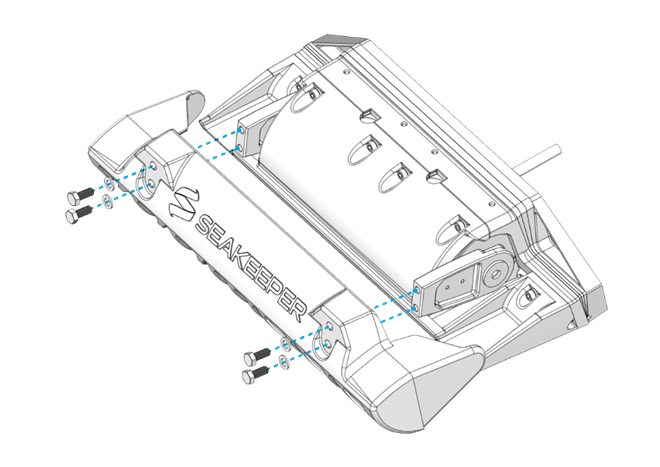
- Remove the 6 (8 if on a 600 Controllers or 9 on 750 Controllers) bottom Seal Plate Bolts.
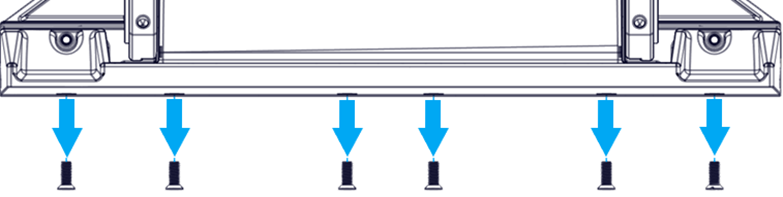
- Remove the top 6 bolts.
- Remove the Seal Plate with the Actuator and pull the Actuator cable through the Cable Gland.
ATTENTION: The following bolts for the Seal Plate to Wedge Pack Assembly should be torqued at 50in-lbs. The Seal Plate’s 6 bottom bolts (Seakeeper Ride 600 Controllers will have eight [8] screws/Seakeeper Ride 600 Controllers will have nine [9] screws) should be fastened FIRST with threadlocker (Vibratite), this will hold the Actuator and Seal Plate to the Wedge Pack Assembly. After the bottom bolts on the Seal Plate have been fastened with threadlocker, then the top bolts should be fastened with threadlocker.
- Align the Actuator so the cable passes through the hole in the Wedge Pack Assembly and the Cable Gland. Feed the Actuator Cable through the Cable Gland and remove as much slack from the outboard side as possible.
- Slide the Seal Plate over the Actuator and Install the six (6) M6-1.0 x 16 mm Allen head screws on the underside of the Seal Plate. (600 mm Controllers will have eight [8] screws.)
- Note: You may need to insert one bolt and washer into the top of the Seal Plate to hold it in place for fastening of the bottom bolts. Do not torque the top bolt.
- Note: Apply threadlocker, but do not apply the final torque during this step until the top bolts are fastened on the top and bottom.
3. Fasten the six (6) M6-1.0 x 30 mm bolts and washers, as shown below. (600 mm Controllers will have eight [8] bolts and washers.) Note: Torque bottom and top bolts to 50in-Lbs.
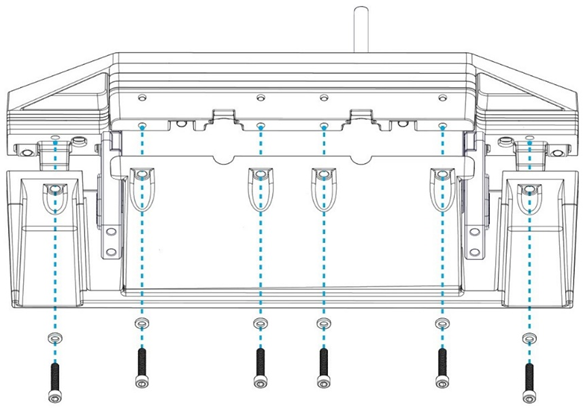
4. Torque the six (6) upper front bolts to 50 in-lbs (5.7 N-m) (eight [8] on a 600 mm Controller).
5. Tighten the Cable Gland on the inboard side of the transom. The Cable Gland should be snug to prevent leaking, but do not overtighten. Gently pull on the cable to ensure there is no movement and prove it is sealing securely.
Note: The Cable Gland must have a rubber grommet in place to properly seal. The outside of the cable must be clean of debris, dust, adhesives, etc. to properly seal. Do not allow acetone to encounter the Controller Cable Gland Sealing Nut.
6. Install the Blade to the Actuator Arms using the four (4) M8-1.25 x 20 mm screws and their washers. Torque these four (4) bolts to 80 in-lbs (9.0 N-m) in an ‘X’ pattern.
7. Once installed, push the Blade all the way down and verify that the Blade is not contacting the Seal Plate. There should be a small, even gap between the Blade and the Seal Plate. Contact Seakeeper if the Blade does not meet this requirement.