Pocket Fit Kit Installation
Pocket Plug Installation
3D Printed Trim Tab Pocket Fit Kit FAQs
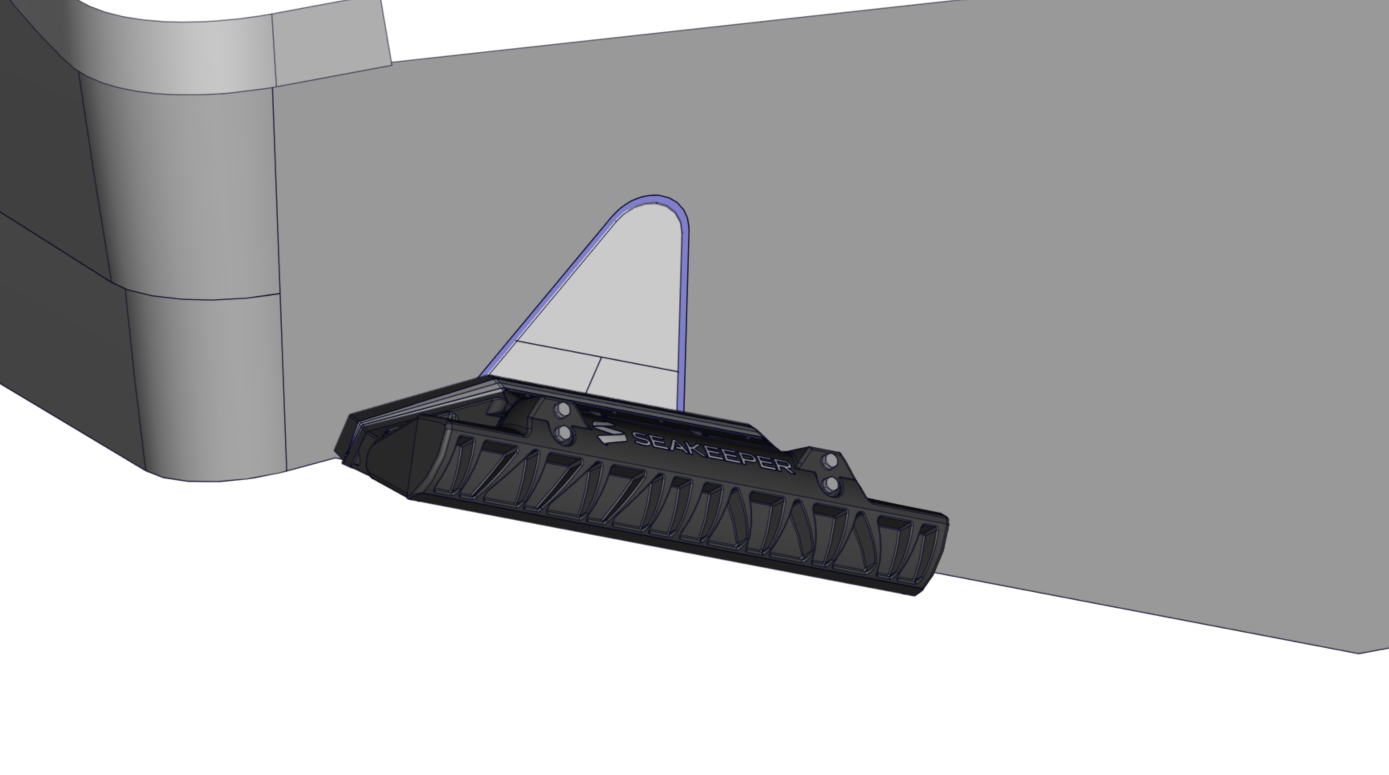
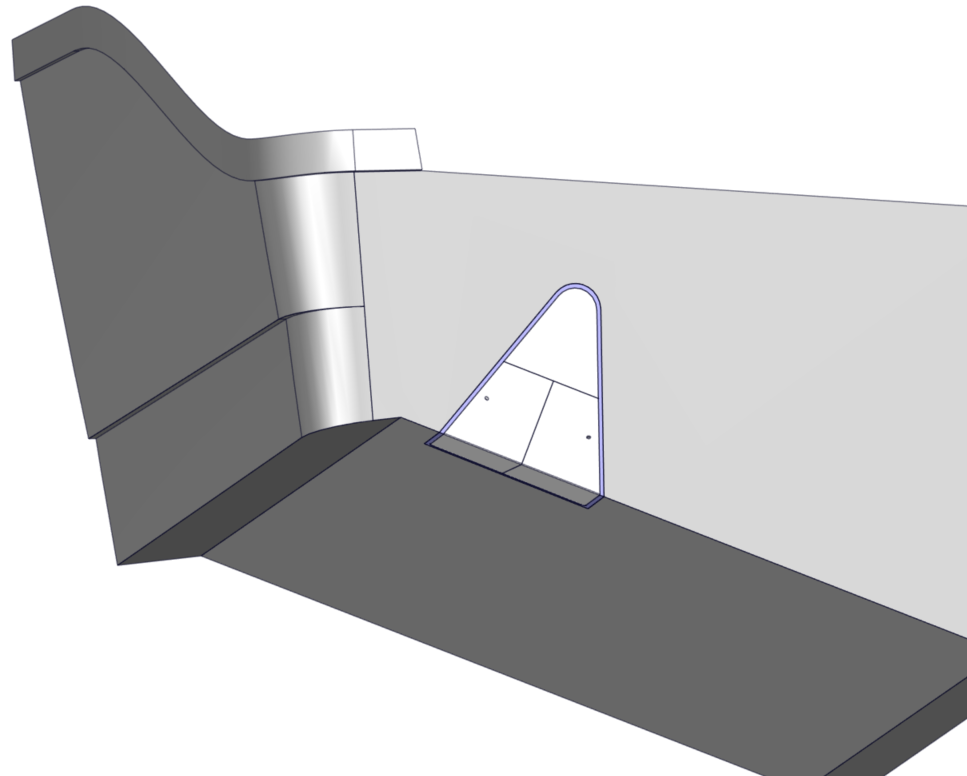
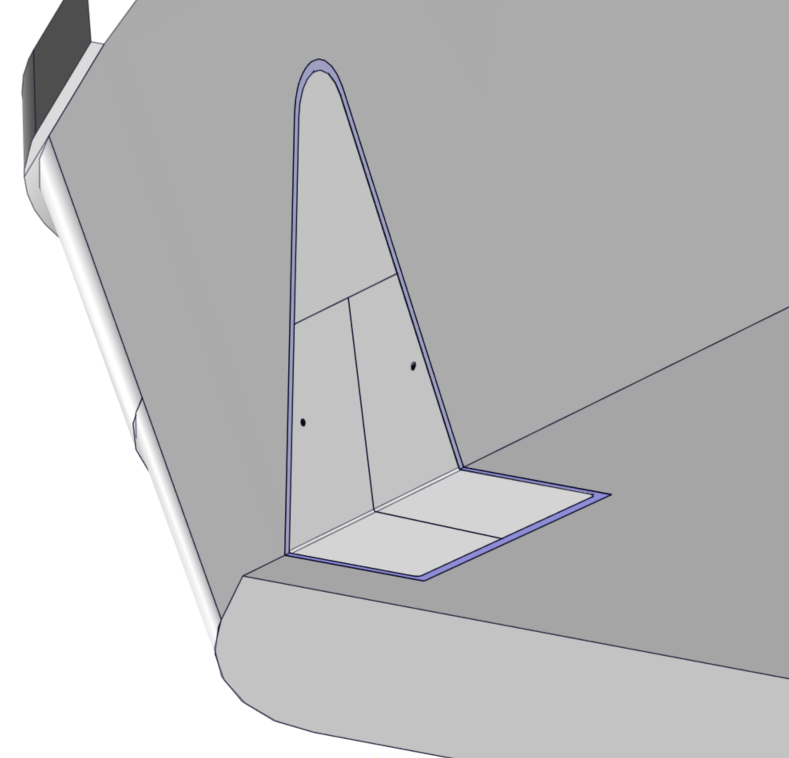
Seakeeper Ride installed over Pocket Fit Kit, Left. Transom with Pocket Fit Kit inserted, Right.
- What are the Pocket Fit Kits made from?
- Seakeeper has selected PETG based on its ability to work with our approved two-part Methyl Methacrylate Adhesives (MMAs) https://manuals.seakeeper.com/ride/seakeeper-ride-mechanical-installation-manual/3-additional-equipment-needed/. We have tested it for water absorption and strength in fatigue.
- Can I paint (or gel coat) the Fit Kits?
- Yes! We encourage owners to coat the material. Gel coat adheres well to the material with little surface prep.
- Do I need to surface prep the parts?
- Yes, a denatured alcohol wipe is all you need to remove dirt and oil and then the adhesives do the rest of the work.
- Do I need to fiberglass over top of the parts?
- No! The parts are designed to support the loads all by themselves, however you are welcome to add fiberglass if you choose.
- Are the parts hollow?
- No, the Fit Kits are printed solid with a rib and shell structure that handle the loads, which is not typical to 3D printed world.
- Can anyone print the parts?
- No, Seakeeper has worked with a number of vendors to find ones who can handle our specific printing style and quality standards.
- What colors are available?
- Right now we only support white and black.
- How do I order?
- Contact your aftermarket sales representative to verify if a make/model/year of boat is available. From there they can discuss pricing and lead time.
Instructions
Overview
These instructions cover how to assemble and install the Pocket Fit Kit.
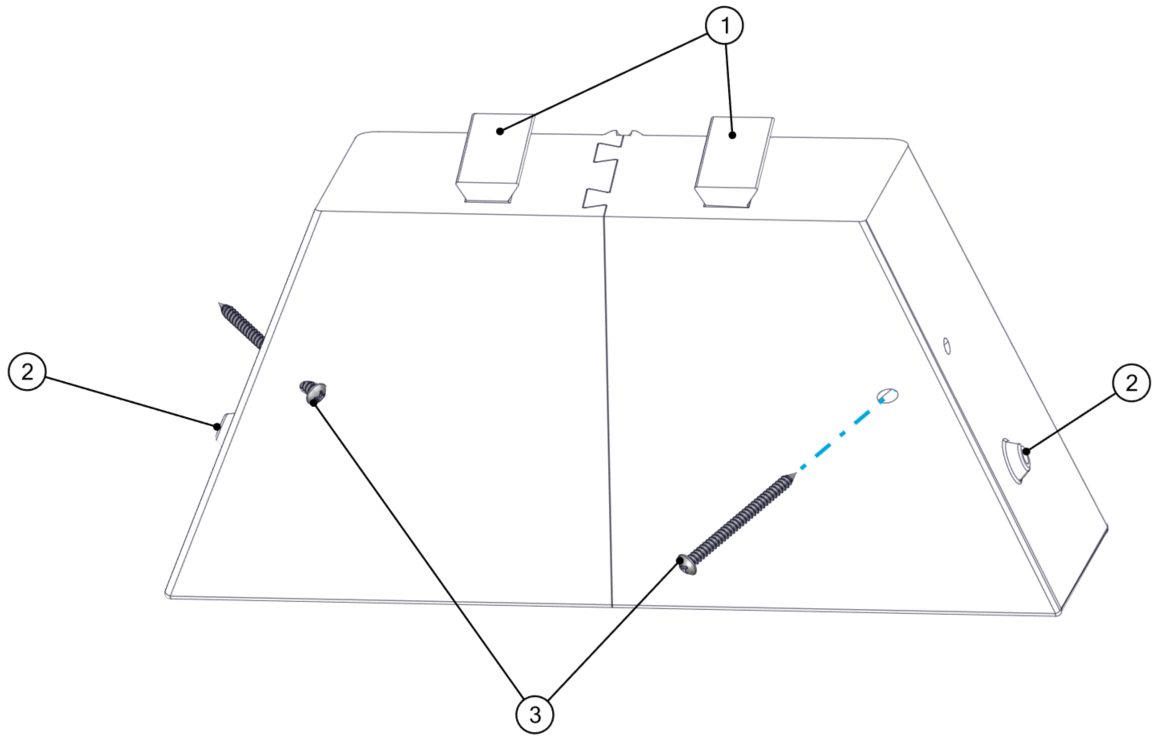
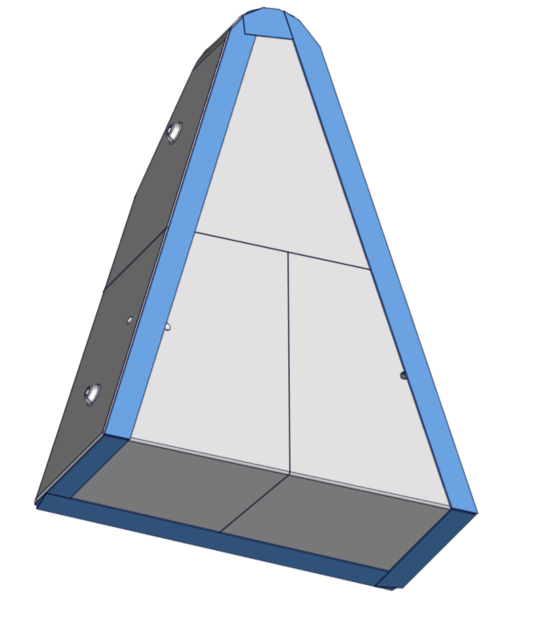
- Dove Tails
- Standoff Bumps
- Mounting Screws (not included)
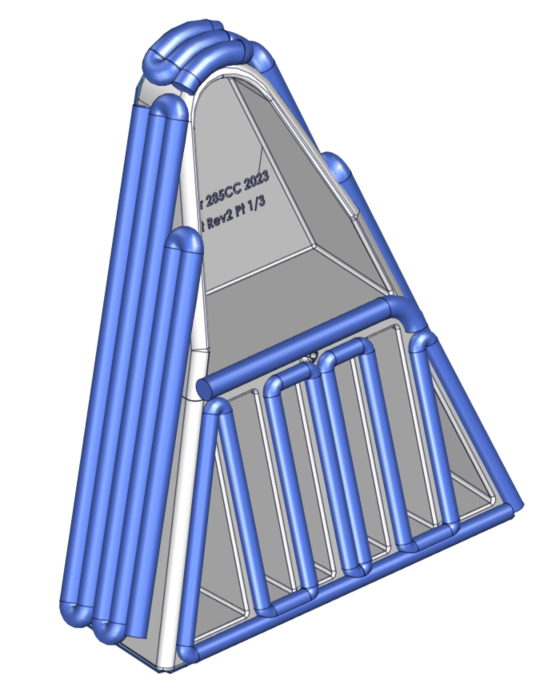
Key Components of Pocket Fit Kit
Equipment that is unique to Pocket Fit Kit installations:
Required
- Additional approved Methyl Methacrylate Adhesive (MMA)
- See our list of approved MMAs here for the installation of the Fit Kit and the installation of the Ride Wedge Pack.
- Adhesive quantity will vary depending on the size of pocket. Generally, 1500-2000 ml will be required (per pocket).
- 2 x Stainless steel set screws No. 8 or No. 10 and 2-4 in. long
Recommended
- Boat jack stands
- Rubber mallet
- Additional stainless steel screws 1-2 in. long to secure pieces together during insertion
Hull Preparation
The hull bonding surfaces must be properly prepared prior to installation of the Pocket Fit Kit.
- Fill all previous holes and penetrations remaining from trim tabs. Use best industry practices for covering and sealing. Do not assume Pocket Fit Kits are sufficient for sealing prior through-hull cavities.
- Place masking tape around the perimeter of the hull in way of the void to be filled.
- Sand the gel coat with 60 grit sandpaper until the gloss is removed from the surface.
- Note: Do not grind. Removing too much material will change the fitment of the Pocket Fit Kit and decrease the strength of the finished product.
- Thoroughly wipe the bonding surface clean of any contaminants using denatured alcohol.
- Double check after sanding and cleaning that all through-hole cavities from previous trim tab installation are sealed to ensure a watertight hull.
Pocket Fit Kit Preparation
The Pocket Fit Kit must be assembled, cleaned, and taped prior to installation.
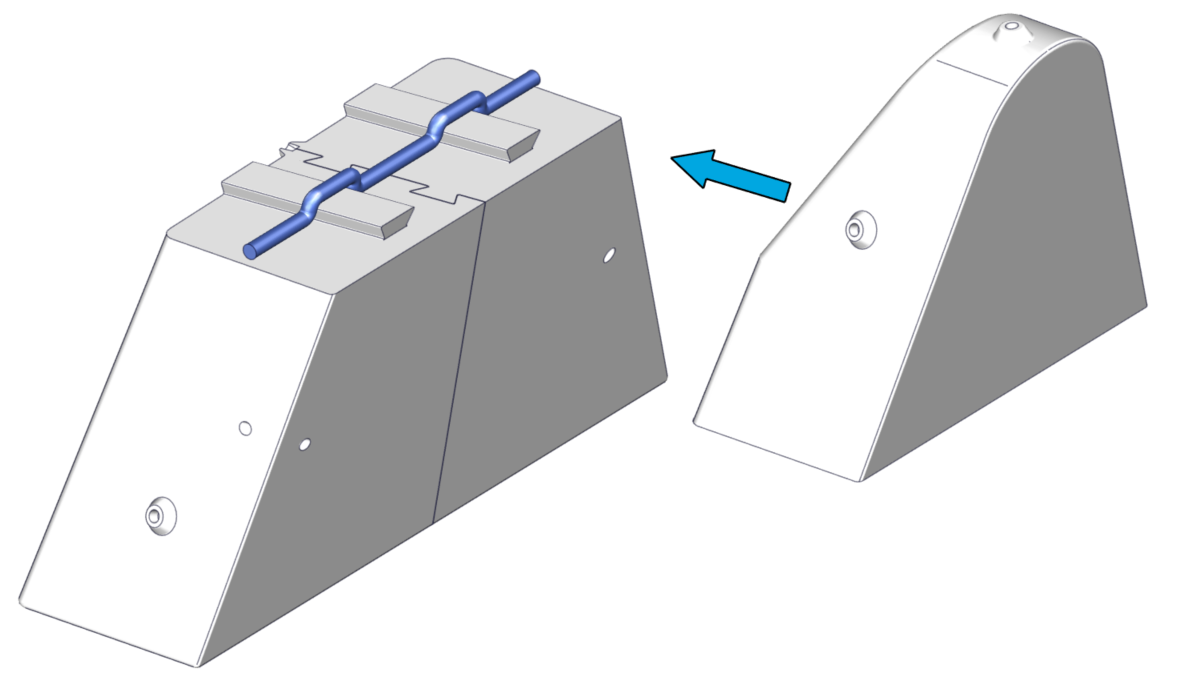
- If Pocket Fit Kit consists of multiple pieces, assemble them by sliding the dovetails into their respective channels. Before connecting each piece, dispense a bead of approved adhesive along one of the joint surfaces to ensure a strong and permanent connection.
- It is recommended that the pieces be further fastened together with a stainless steel screw to assist in keeping all the parts flush and together during insertion of the assembled Pocket Fit Kit.
- If any adhesive contacts the surfaces that will be exposed once installation is complete, clean it off quickly with denatured alcohol to make for a neat finished product.
- Place masking tape around the perimeter of the Pocket Fit Kit faces that will be exposed after insertion.
- Wipe the Pocket Fit Kit clean of any contaminants using denatured alcohol (acetone may soften the surface of the PETG). Note that the Pocket Fit Kit should not be sanded.
Pocket Fit Kit Installation
Pocket Fit Kit installation can begin once the bonding surfaces on both the transom and Pocket Fit Kit are properly prepared.
- Dry fit Pocket Fit Kits to ensure the pieces will sit flush with BOTH the transom and hull bottom once installed. Verify this is the case for port and starboard side.
- Confirm that the adhesive gap around the perimeter of the Pocket Fit Kit is uniform all around.
- If the Fit Kit does not sit flush and/or the adhesive gap is not uniform, adjust the Pocket Fit Kit standoffs to amend the alignment. Standoffs can be adjusted by driving a screw into the standoff to increase height or sanding the standoff to reduce height.
- Drill and test fit Pocket Fit Kit positioning screws.
- Once proper alignment is verified for both Pocket Fit Kits, liberally apply an approved adhesive to the bonding surfaces on the transom and around the Pocket Fit Kit positioning screw holes. Methyl Methacrylate Adhesives (MMAs) approved for Seakeeper Ride installation (between SMC and Gel Coat) are also compatible with Pocket Fit Kit materials (PETG). Avoid applying adhesive on surfaces that will not be covered by the Pocket Fit Kit.
- Liberally apply an approved adhesive to the bonding surfaces of the Pocket Fit Kit. Avoid applying adhesive on surfaces that will not make direct contact with the transom.
Adhesive Generously Applied to Transom and Pocket Fit Kit.
- Insert the Pocket Fit Kit into position and secure the Pocket Fit Kit in place via the mounting screw holes. If using mounting screws, ensure they are completely sealed with adhesive to prevent water intrusion. Mounting screw holes will be on the face of the Pocket Fit Kit covered by the Ride Transom Plate to conceal them.
- Ensure adequate adhesive has been used such that excess adhesive is squeezed out of gaps when Pocket Fit Kit is flush with hull bottom and transom.
- Ensure the adhesive gap around the perimeter of the Fit Kit is uniform and that the Fit Kit sits flush with the transom. Use a straight edge to ensure the Pocket Fit Kit is flush with the running surface.
- If further support is required along the running surface, use a jack stand to support the Pocket Fit Kit.
- If no jack stand or additional support is added, monitor the Pocket Fit Kit during the advertised working time of the adhesive being used.
- Be careful to ensure parts do not sag while adhesive cures.
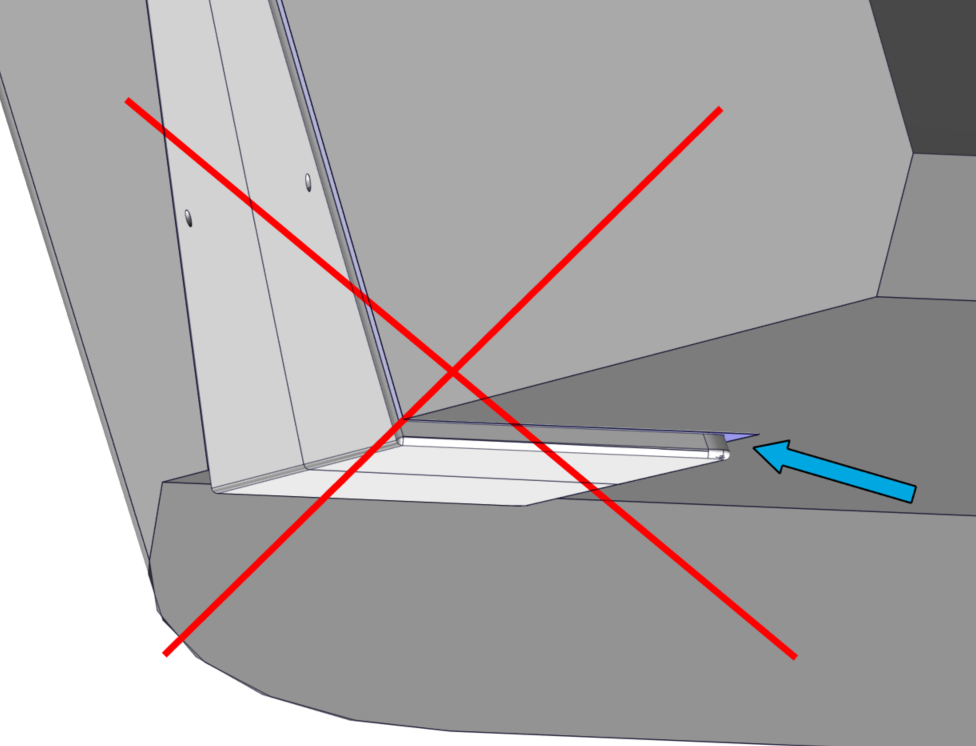
- It is critical that no part of the Pocket Fit Kit extends below the running surface of the hull where it may be subjected to unexpected hydrodynamic loads.
- Use a putty knife to fair the adhesive flush with the flat transom and hull bottom surfaces.
- Once the Pocket Fit Kit is mounted and properly aligned, remove masking tape, clean excess adhesive, and fill any visible gaps that form in the adhesive.
Pocket Fit Kit Mounted and Masking Tape Removed
Seakeeper Ride Installation
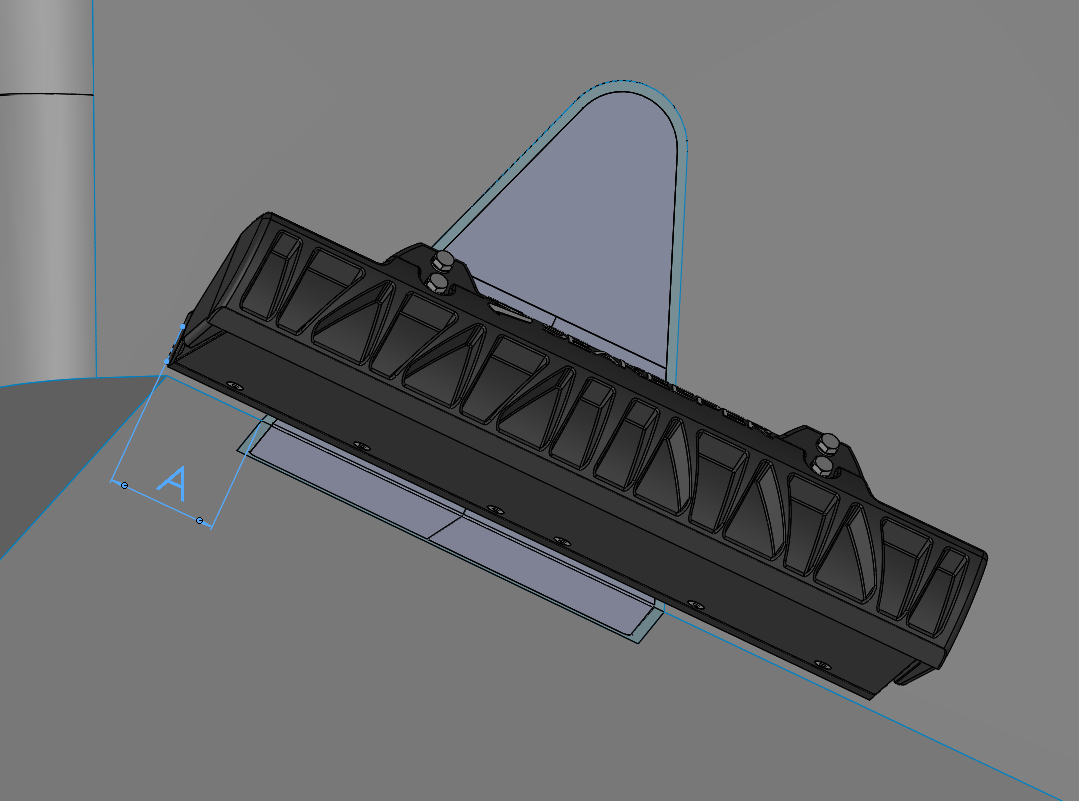
Once Pocket Fit Kit is secured, proceed with the installation of the Seakeeper Ride system. Please observe the following adjustments to the Ride mounting location when using Pocket Fit Kits.
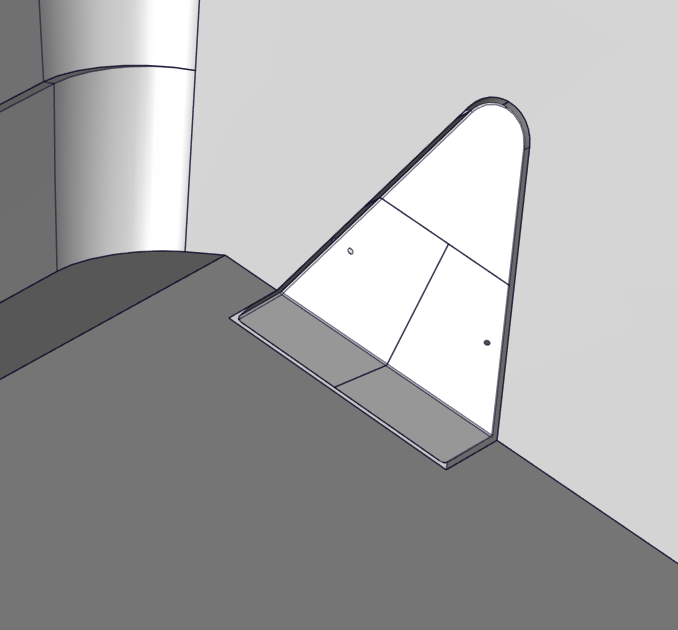
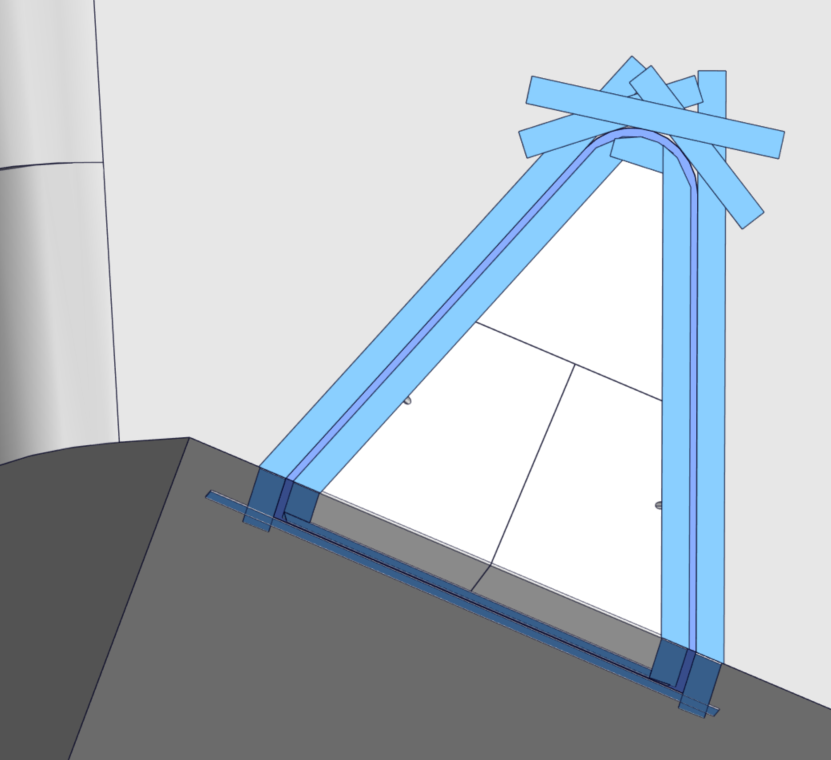
The Seakeeper Ride Transom Plate must be placed according to one of these two location parameters:
- The Transom Plate must only overlap one edge of the Pocket Fit Kit.
OR
- If the Transom Plate overlaps both edges of the Pocket Fit Kit, the Ride Transom Plate must extend onto the hull of the boat a minimum of 3 in. (7.62 cm). See Dimension A in the figure below for reference.
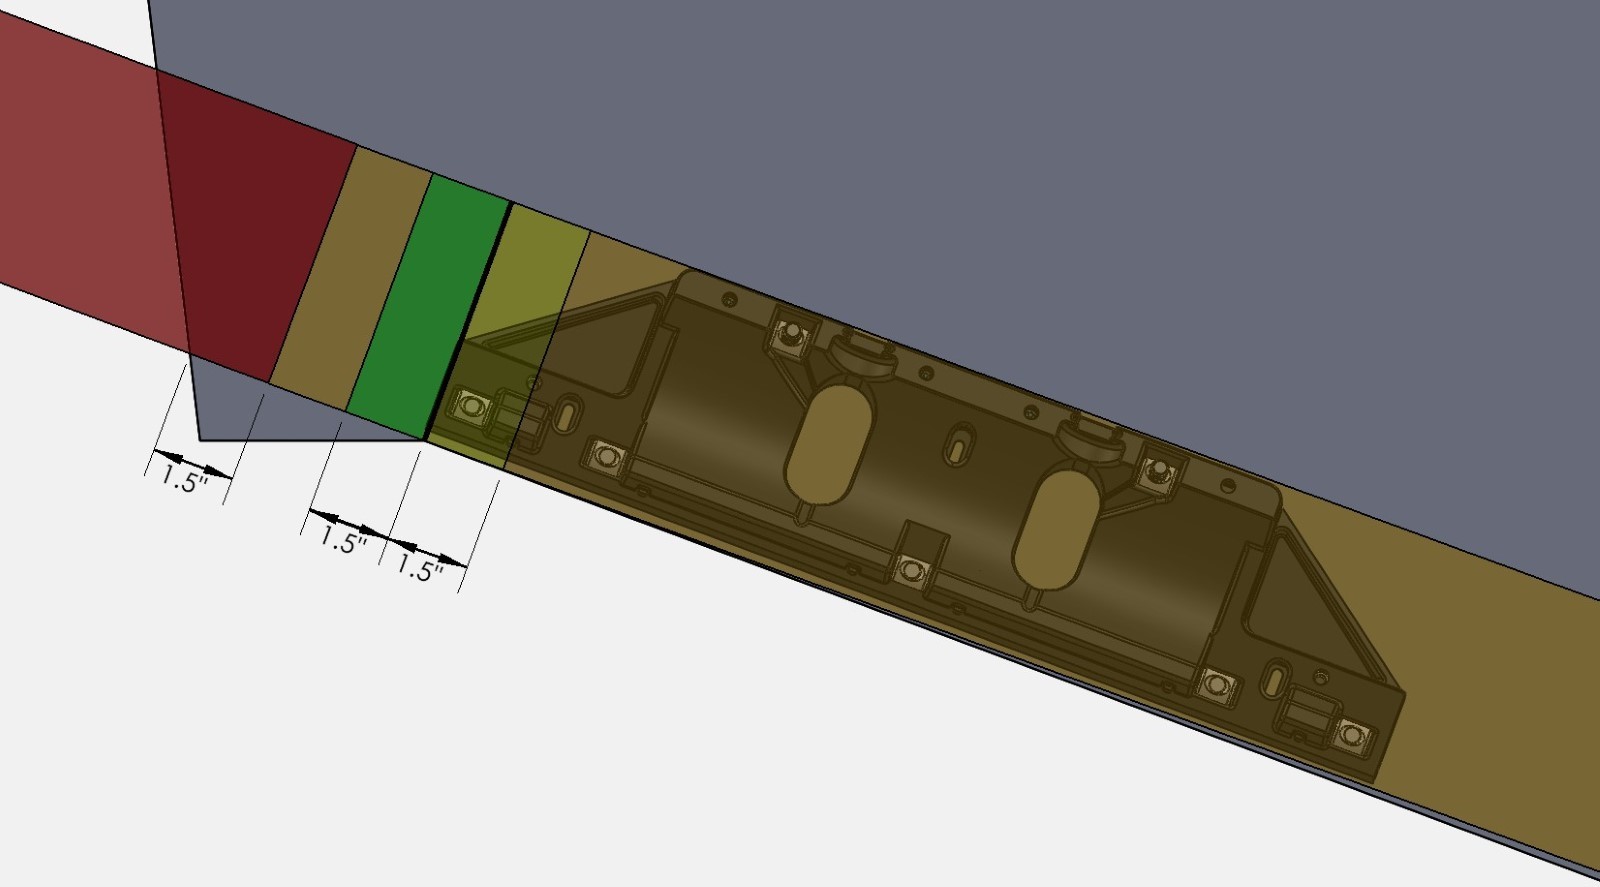
Notes in accordance with the Mechanical Installation Manual:
- The outboard edge of the Transom Plate must be at least 1.5 in. from the edge of the hull to prevent water from catching the edge of the Controller.
- If the outboard edge of the Transom Plate extends more than 1.5 in. past the reverse chine point, overall Seakeeper Ride performance will diminish quickly.
- If the outboard edge of the Transom Plate extends inboard of the reverse chine point towards the centerline more than 1.5 in., roll performance will diminish quickly.
- (See figure below.)
Recesses
Some Pocket Fit Kits are made for hulls where the previously mounted trim tab was recessed into the hull bottom. Ride has performed testing on similar hulls where the recess was not filled, and Ride performance was not degraded.
You will notice if this applies to you when the Fit Kit arrives with only a transom section, not a recess section.
In these instances, the Pocket Fit Kit will be mounted such that the bottom of the fit kit is flush with the trim tab recess.
In these instances the Ride Seal Plate shall be installed such that the Seal Plate is flush and parallel with the trim tab recess, NOT the surrounding hull bottom.