Check Actuator Friction
Seakeeper Ride | Check Actuator Friction
Introduction
The Seakeeper Ride design utilizes a round Actuator clamped in place by the Seal Plate and Actuator Plate. This design allows for flexibility in installations, easy maintenance, reduced stocking parts as well as preventing damage if underwater objects are struck. The design requires that the friction generated to hold the Actuators in place is checked as part of routine maintenance. This procedure will require the boat engines shut down, access to the Controller assemblies and the Seakeeper Ride system turned on and in manual mode.
Please follow the procedure below for instructions on how to check:
Checking Actuator Friction
1. Ensure you have access to Controllers. If the boat is in the water this may not be possible, therefore the boat may need to be hauled out of the water or trailered for the full procedure.
2. With the boat hauled out of the water or on a trailer, turn the Seakeeper Ride system on.
3. Select Manual Mode on the Seakeeper Ride application.
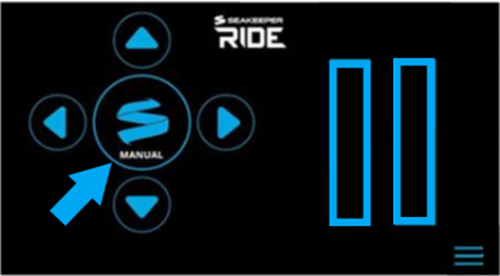
4. Ensure no fault codes are present on the Seakeeper Ride system, which ensures the Actuators will hold the Blade in place.
5. Go to each Controller individually and attempt to move the Blade up and down by hand. Do not use excessive force, approximately 5lbs (2.2 kg) is sufficient.
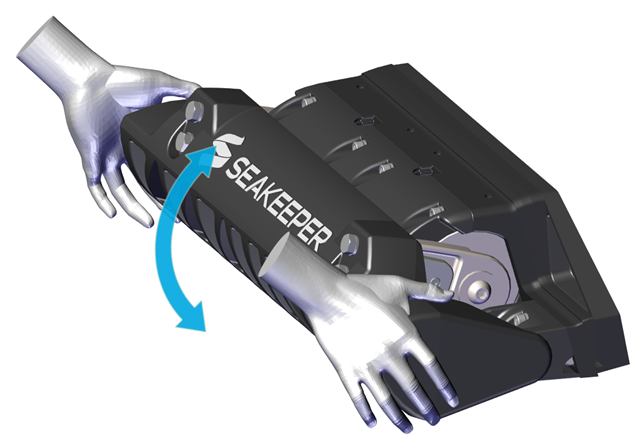
6. The Blade should be ‘locked’ in place by the Seakeeper Ride control system. If there is no movement, the equipment passes this check.
7. If the Blade and the silver portion on the side of the Actuator (surface 2 below) move together while the black outer rim of the Actuator (surface 1 below, highlighted in red) stays in place, review procedure and ensure the Seakeeper Ride system is turned on and commissioned and in Manual Mode.
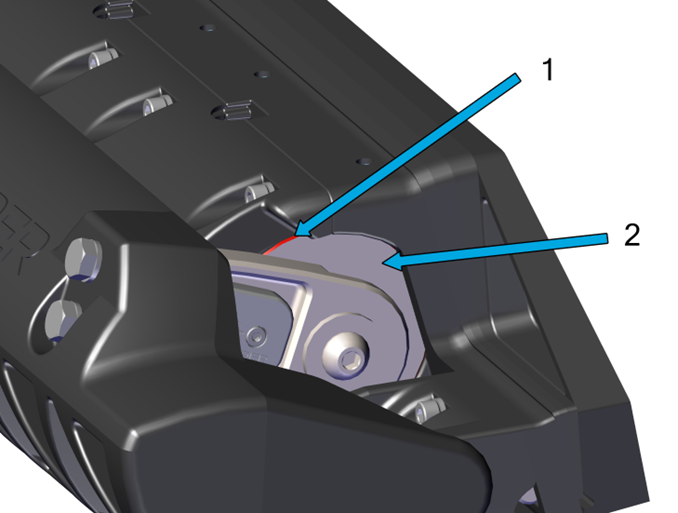
If the Actuator and Blade are fixed in relation to one another and both move in relation to the Seal Plate (surface 1, surface 2, and the Blade all move together), follow this secondary procedure:
- Remove the Blade and Seal Plate.
- Reinstall the items following instructions in Section 12 of the mechanical installation manual – https://manuals.seakeeper.com/ride/seakeeper-ride-mechanical-installation-manual/12-actuator-and-blade-installation/actuator-and-blade-installation-introduction/ .
- Pay special attention to the sequence and thread locker. It is critical that the lower counter sunk screws are torqued prior to installation and torque of the upper screws.
- Repeat steps 1 through 7 above to determine if the Actuator is slipping within the Seal Plate. If it is, please contact Ride Customer Support for guidance on how to proceed.